Custom Pages

8/30/14

DIY || #29 || Carrying Around My Mini Sunshine

Pin It!
I know, I know...I'm just as obsessed with florals as I am with polka dots. Forgive me! I couldn't stray away from making this Daisy Floral clutch after walking through Michael's and seeing tons of summer floral bouquets on sale now that fall is approaching. This project is incredibly simple to make, and I was inspired by previous wonderful projects done by Chic Steals and Design Improvised. Definitely check them out for more ideas! There is so much creative flexibility with making a floral clutch so definitely tweak it to your own style and go crazy! See below for the easy step-by-step directions...

What you'll need: plastic flowers (I used daisies and yellow/green hydrangeas), plain clutch bag/purse, hot glue gun and glue sticks, and scissors. 

First, make sure to cut the stems of the flowers so they are very short and can be glued flat onto the bag. Next, place a few hydrangea flowers on the clutch to set a colorful base and then glue them on. Begin gluing daisies directly on top of the hydrangeas, then glue more daisies until you fill the rest of the open spaces on the bag. This particular bag had a long zipper that stuck out on the end, which I didn't like very much, so I simply tucked in the excess zipper and glued it to the inside of the clutch. That's it folks! Hope you like it, and let me know if you try it out yourself! 


6/10/14

DIY || #25 || Natural Wallpaper in 3D

Pin It!

Despite the many downsides to moving, there also quite a handful of joys. For starters, you get to rid of stuff you somehow managed to hide away for months. And the best part is planning an entirely new decor theme for your space. As always, I got my eye on keeping a low budget all the while finding unique ways to style my space. Thus, I present to you, the Framed 3D Botanical Wall! Some of you may have seen a twist to this DIY from before when I was in college, but now that I've 'upgraded' to real-world adult life, I've transformed this decor into something more refined, polished, and sophisticated. As always, super easy and super affordable! Here's the break down:


You'll need: empty frames (bought a whole bunch of different sizes at Goodwill for $2 each!), fake flowers, cream colored masking tape, scissors, nails, and a hammer. 


I first started out by organizing the frames and flowers on the floor to get an idea of a pattern. Then, simply hammer nails into the wall where desired, hang your frames, and tape the flowers into an organized and neat pattern. Easy breezy!

I kept my decor just to a diagonal, but you could easily fill up a whole wall with this decor. Hope y'all like it!


5/28/14

DIY || #23 || CLEAR FLORAL STUDDED PURSE

Pin It!

I think it might be too obvious that spring time influenced this DIY project! Grab those plastic bags (or make your own like I did) and add that extra pop with one thing most people have in their house...nail polish! Here's what you'll need if you're doing it from scratch: nail polish, gold chain, gold clasps, scissors, 1/4 yard of polyurethane material, and a needle & thread.


So let's get started, shall we? First start by cutting the polyurethane into a square, then folding it into a neat envelope shape. Once, set sew the edges together, trim the excess with scissors and attach the golden clasps to the front. Then, the fun part! I first dotted the bag with white nail polish and then painted floral leaves with quick brush strokes in various other colors.


Lastly, punch two holes in the top corners of the bag with a hole punch or with scissors, clip the golden chains through the holes, and voila!


5/10/13

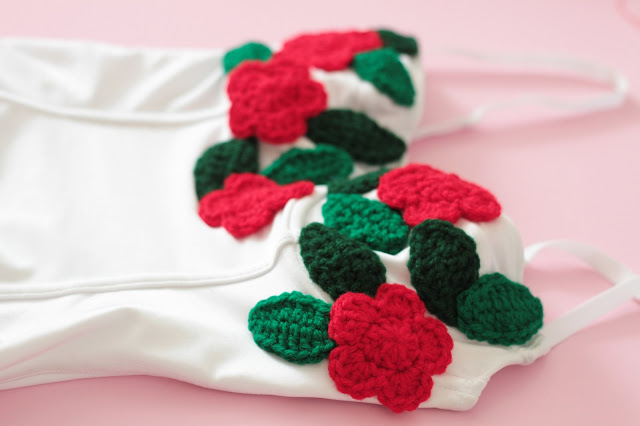
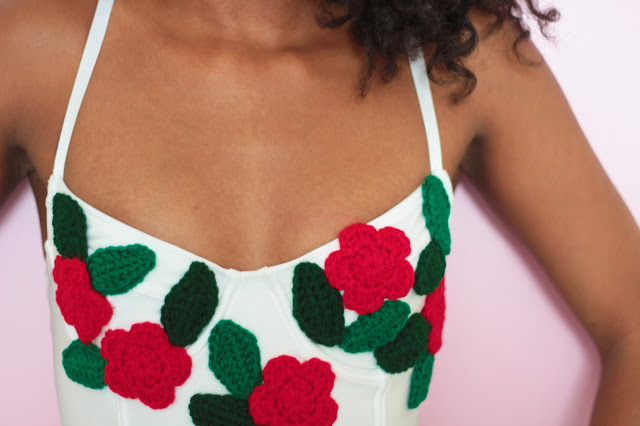
DIY Project || #21 | Crochet Floral Bathing Suit & BuzzFeed

Pin It!
DIY Floral Crochet Bathing Suit
So excited to announce a project I recently did for BuzzFeed this month! The new DIY section of BuzzFeed has been gaining incredible amounts of attention since it started and the authors were looking for some fresh bathing suit DIY projects. I was pleasantly surprised to be selected as a contributing blogger and whipped up what is now one of my favorite DIY projects thus far! This fresh, unique, and colorful DIY was inspired by the Mexican embroidery I love (it's everywhere in Southern California where I'm from...and my parents spent 10 years living in Mexico, so it's all around our house too!). I have nowhere near the skills (or time) to actually properly embroider anything, so I took a bit of a shortcut and used these amazing crochet flowers and leaves to mimic the effect. You can find a wide variety of handmade crochet items on Etsy, and I fell in love with HCK Crafts' flowers. Not only are they superbly made, but the maker - Michele - put together a custom order for me in one day...so I'm definitely going back for more. Plus, the six big flowers cost only $3 and the 12 leaves for only $2.50!! It was a match made in heaven for me. Anyways, check out my bathing suit DIY on BuzzFeed for the full tutorial, as well as to check out some other awesome bathing suit DIYs featured by Anna Evers at Plan B and Aimee at Clones N Clowns.

5/1/13

DIY Project || #19 || Mother's Day Gold & Floral Gifting

Pin It!
mother's day floral and gold gift wrapping
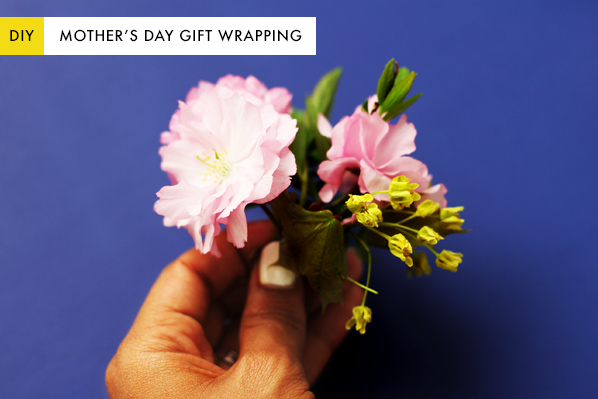
Mother's Day is just around the corner and I am loving all the beautiful gift ideas floating around the DIY blogosphere! In the spur of the moment, I decided to take a whack at my own mother's day gift wrapping and, as expected, veered towards floral and gold accents (there's something about me and gold if you couldn't tell already...my blog title is a lil' overboard...just maybe?). I saw these wonderful gold letter stickers at Blick's Art and Materials craft store in Boston and wanted to incorporate them somehow. With sticker letters, you can write messages on your wrapping paper specific to the mother, aunt, sister, friend, or grandmother that has had a special impact on your life. I chose the typical "love" message as my gift box was small, but a larger package would allow you to write several words. Well, that's enough chatter for now -- lemme show ya what I did!

Here are the materials you will need: small flowers (picked them from the street! yay for spring!), double-sided tape, gold sticker letters (find in craft or office supply stores), and plain wrapping paper.
mother's day floral and gold gift wrapping
The instructions are super easy and straightforward! After wrapping your present, decide on the word(s) you wish to use and start placing the golden letter stickers onto your packaging leaving a space to fit your floral accent bow.
mother's day floral and gold gift wrapping
Once satisfied with your gold letter placement, bunch together your flowers and leaves and tie together using a vibrant ribbon (I chose pink). Trim the ends so they are short. Attach a piece of double-sided tape to the top of the package and stick the floral bow onto it. Voila! All done! Now just wait and watch how troubling it will be for the recipient to take apart such lovely wrapping! Good luck, and Happy (early) Mother's day!
mother's day floral and gold gift wrapping

1/15/13

DIY PROJECT || #7 || FLORAL ICE CUBES

Pin It!

INGREDIENTS 
Small petaled flowers
Ice cube or cupcake/muffin tray
Water
Freezer


STEP ONE: Gently pull petals from their buds.
STEP TWO: Place petals into ice cube/muffin tray cups. I chose to go with a spring look, so I combined pink, purple, and white with most of them. Some I left with two colors (white and yellow). Experiment with the look you want to have! 
STEP THREE: Slowly pour cold water into the cups until desired height. I did mine about 3/4 of the way.
STEP FOUR: Slide the tray into the freezer. Leave in for at least 1.5 - 2 hours. When frozen, pull the tray out, wait for 5 minutes for cubes to begin melting then, using a knife around the edges, gently loosen and wiggle the cubes until they can slide out. Pop into a cup/pitcher of water, lemonade, or iced tea and - voila! - you've got a classy a** drink. If desired, you can put the cubes into tea leaf bags so that, when they melt, the flowers will stay contained and not get swallowed up!


GET KIPI EVERY WEEK IN YOUR EMAIL!